-
This is a bunch of instructions to assist you in fitting our E30 Engine Subframe Reinforcement kit.
Firstly, this isn’t a difficult project if you’re a dab hand with a welder.
However, if this is your first welding project with your $200 ebay stick welder – leave it to a professional. Like us.
Ok, first point of call is to get the remains of the 20 plus years of Aussie road gunk, kangaroo brains and that oil leak that you never got around to fixing because you had to buy wheels instead. Fair call.
Degrease it good and then strip the paint off the areas you need to weld on. Sandblasting is great. Paint stripper can also work. Whatever you need to get the paint off the inside of the engine mount pad.
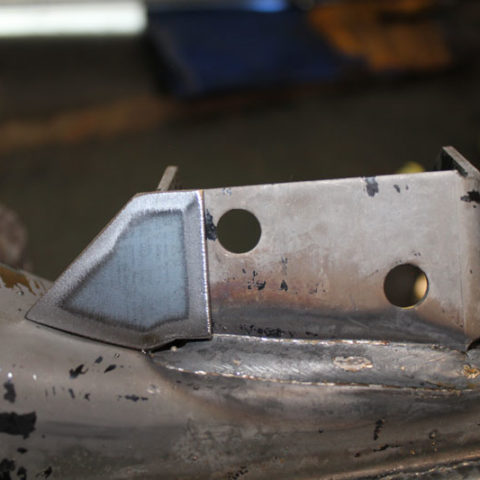
The first item to attach is the engine mount pad reinforcing plate.Line up the holes and clamp it in place with clamps or a bolt. Tack weld in a couple of spots.

Put a nut and bolt in to hold it to the subframe if you haven’t already.
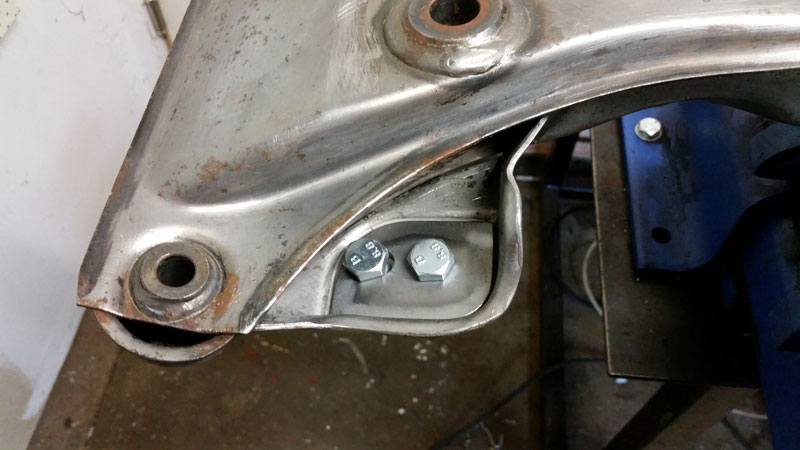
Weld around the perimeter completely.
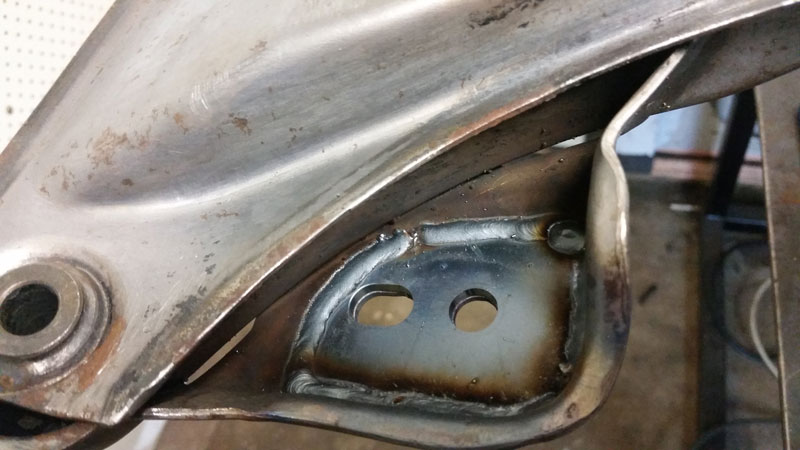
Remove any slag before moving on to the next step.
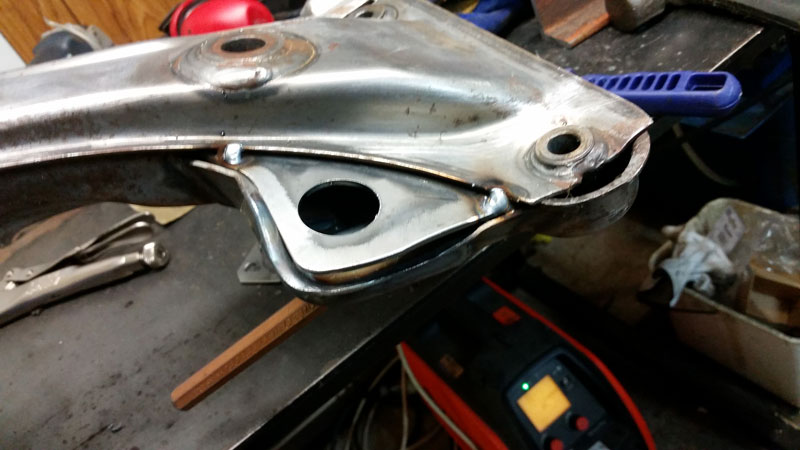
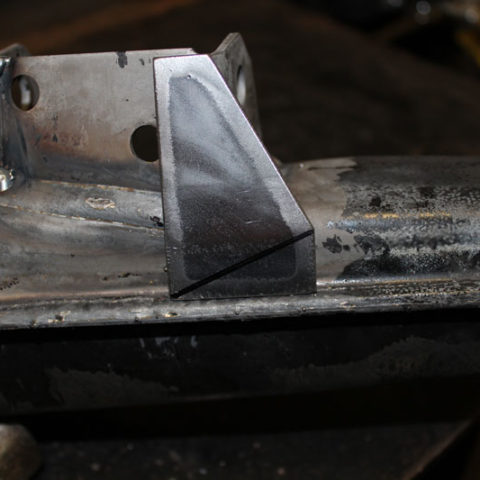
Take the reinforcing gusset and test fit it in its home.
As we mentioned in the product listing, every now and then these will need a bit of grinding to fit spot on.
Make sure to leave a small gap on the inner edge to ensure the gusset can slide past the subframe when you start bending it.
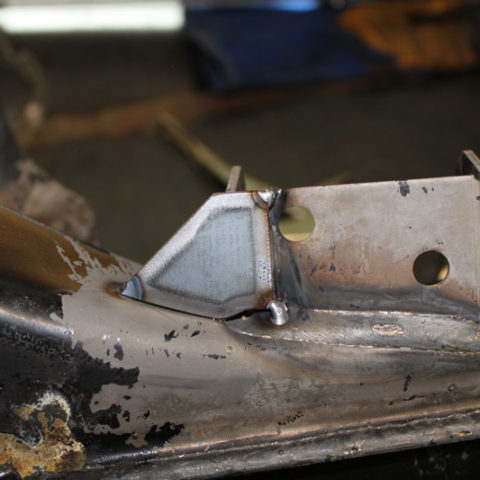
Hold it against the top edge of the subframe and tack it on the outer corners and in the middle.
Now using a hammer, bend the gusset downwards until it is past the “hump” of the engine mount tab.
Tack it again here.
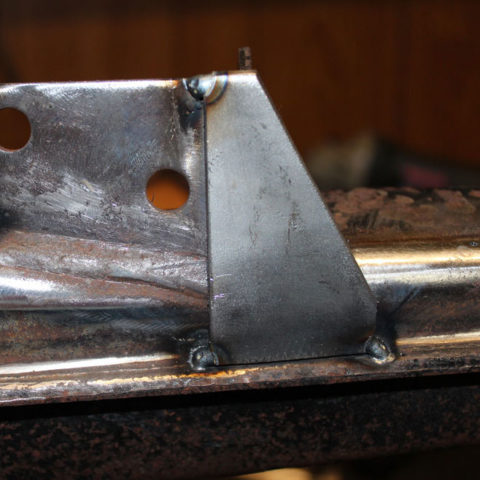
Keep massaging it down until it is flush with the subframe, clamp,
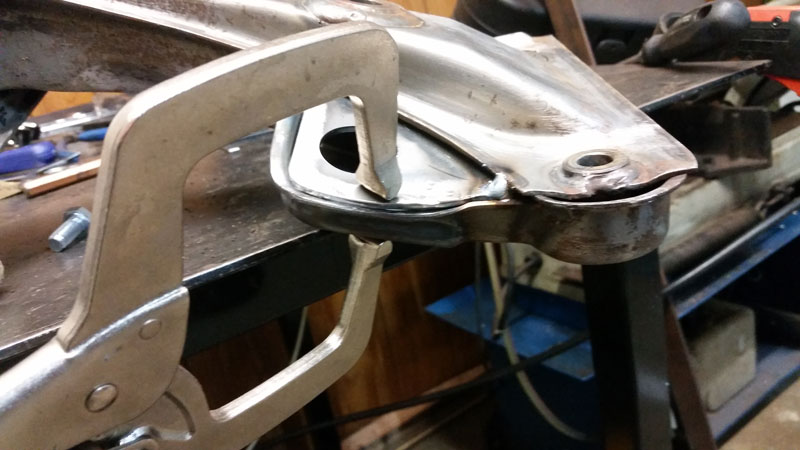
..and tack weld.
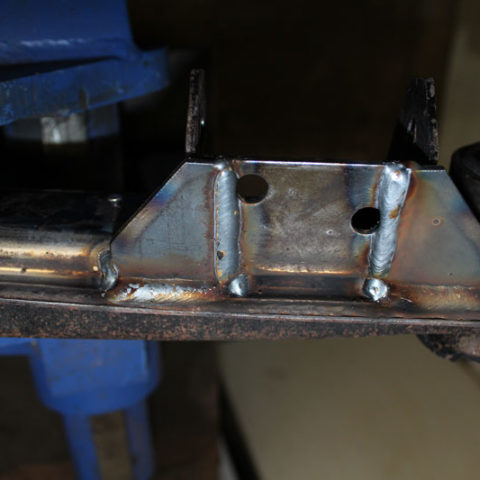
Weld it in place completely around the outside.
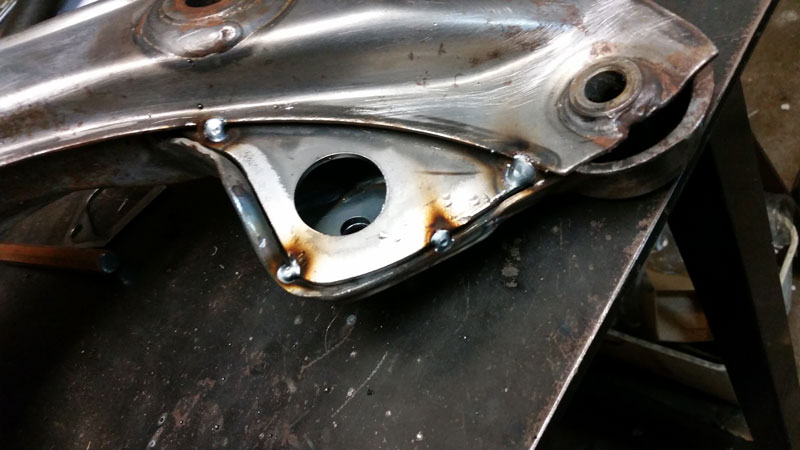
Now for the last step.
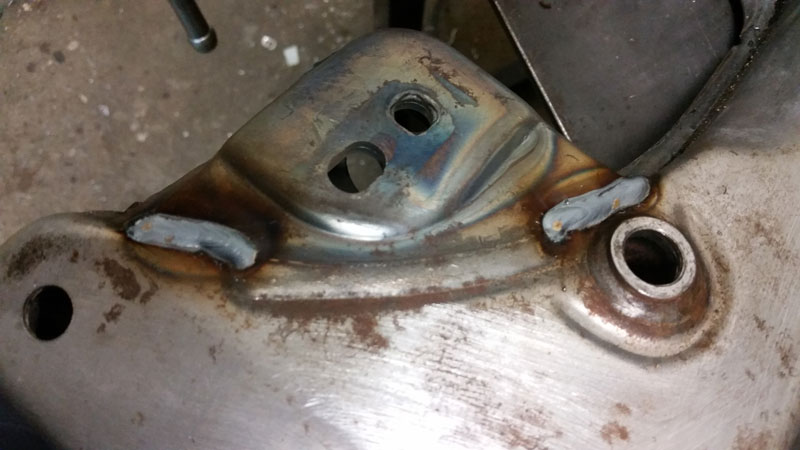
Flip the subframe over and fill in the gaps that are left on the subframe. (See pic below)
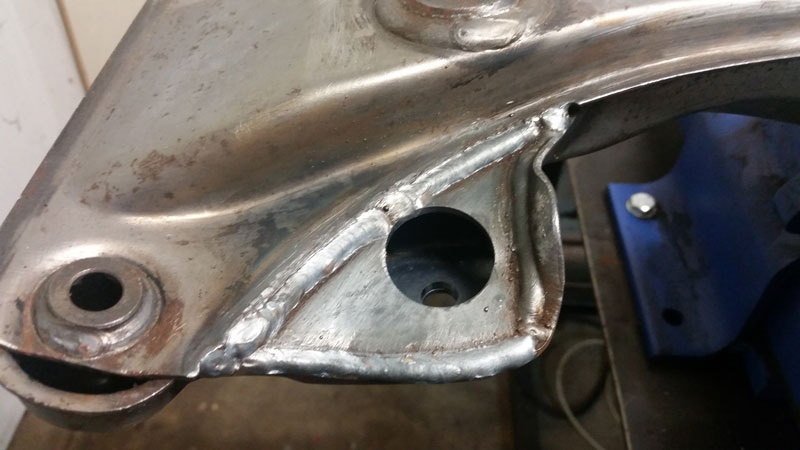
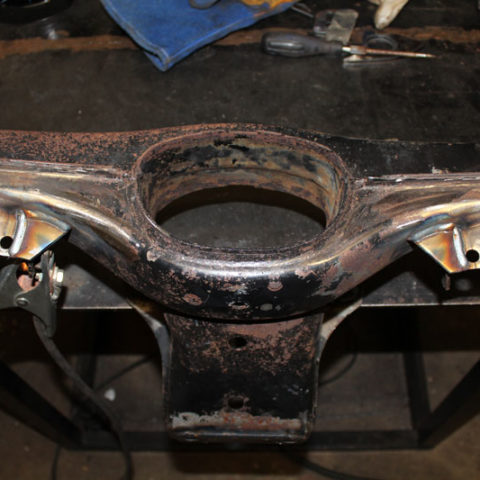
This next section is for the front swaybar reinforcing tabs if you have chosen to go that way.
Grind the factory weld flat like in the picture below. This allows the reinforcing tab to sit flat.
Clamp the reinforcement tab to the subframe, lining up the bolt hole.
Put a nut and bolt into the sway bar mounting hole and tighten to clamp the tab flush with the subframe. Tack weld in a few spots.
Weld completely around the inside and outside of the tab on both sides.
Grind the weld back on the outside to match the original profile.
Make sure to let the welds cool naturally for strength.
Admire your race car fabrication skills.
Wire brush the welds, paint it and reinstall!
-
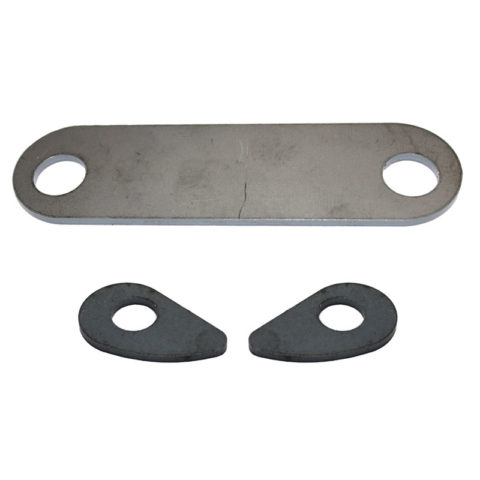
This is the fitment guide to fitting our rear subframe differential mount reinforcement kit.
Firstly strip the paint off the areas around where you are about to weld.
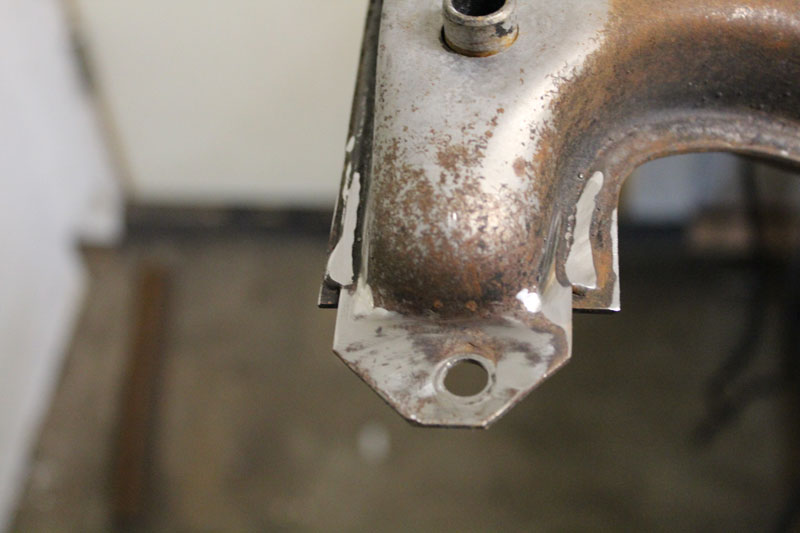
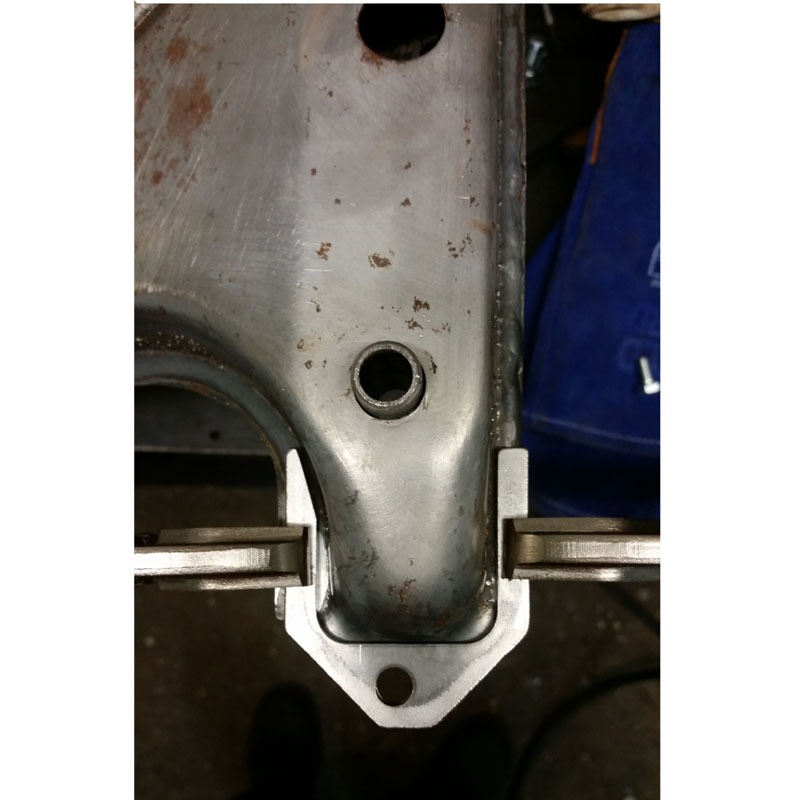
Line the centre rear reinforcement tab up with the mounting holes. The tab is offset to allow a small bead to be made on the section of the subframe facing the rear of the car.

It is better to clamp it first (so you can make sure you are exactly lined up with the holes) and then install
a couple of bolts to clamp the tab to the subframe for welding.
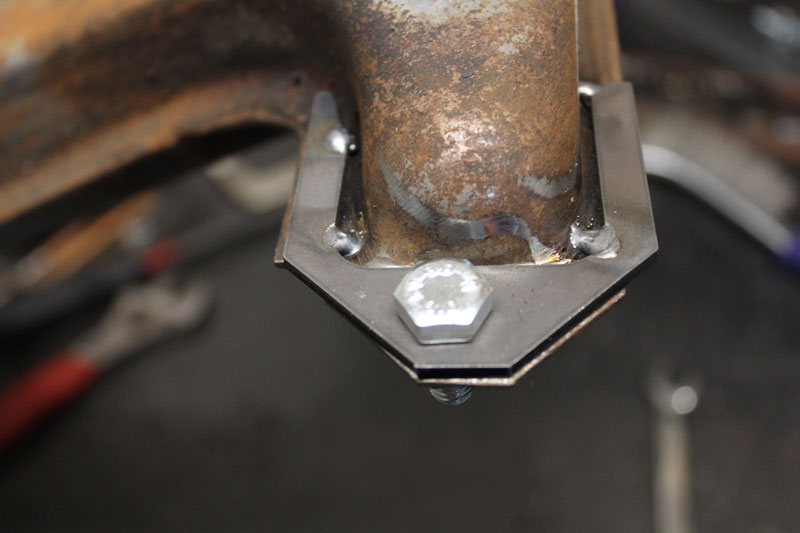
Tack it in at least 4 places, not forgetting underneath.
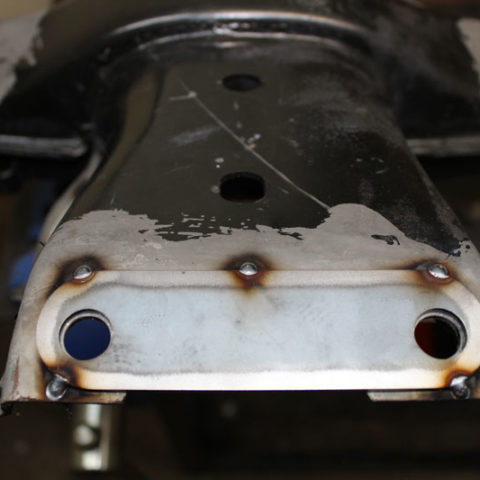
Weld completely around the perimeter. (including on the underside)
That’s the first one done.
Next line up one of the smaller front reinforcement tabs, the curved edge to the outside.
Once again, clamp it in place and give it a good 3 or so tacks.
Weld completely around the perimeter.

Repeat for the other side.
Once finished, let the welds cool naturally.
Wire brush and get some paint on them!
-
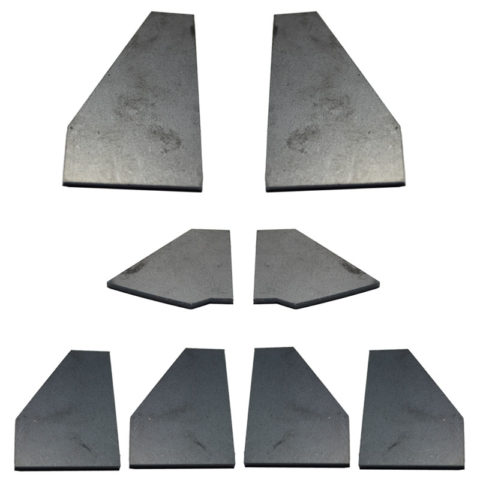
This is a fitment guide for our Rear Subframe Trailing Arm Mount Reinforcements.
Firstly, you want to clean up the area to be welded, removing all paint etc.
The set of 4 same sized medium tabs are to do both the outer trailing arm mount on each side.
Line these up about 5mm past the edge of the holes in the trailing arms, to allow a weld bead to be run past them.
Hold them square, and tack weld on the outer corners.
Don’t worry if any of the tabs are not flush with the top edge – these will need to be ground flat after welding anyway.
Repeat for the other 3 medium tabs. (outer trailing arm mounts)
The next tabs moving towards the diff centre are the longest tabs, one for the outer edge of each inside mount.
To get these perfectly fitted before welding, a couple of tweaks should be made.
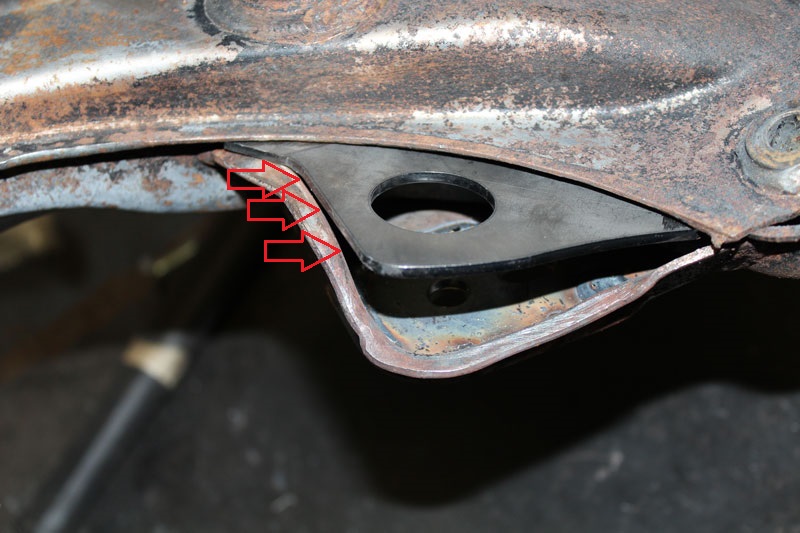
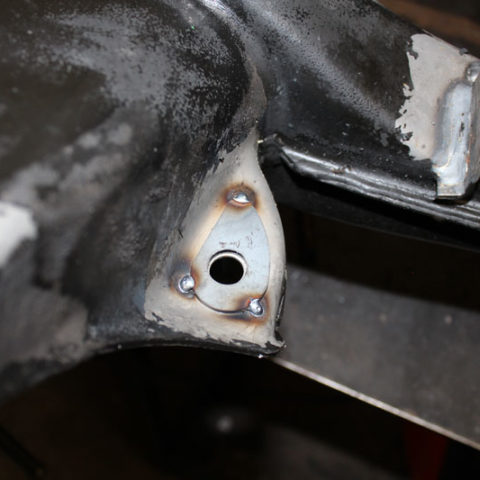
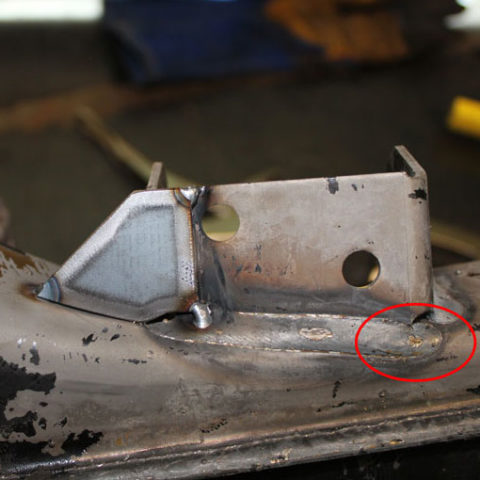
The first is to slightly grind down the factory weld on the trailing arm mount, a small amount, just enough to allow some clearance for the tab.
The area needed to be ground is shown inside the red in the picture below.
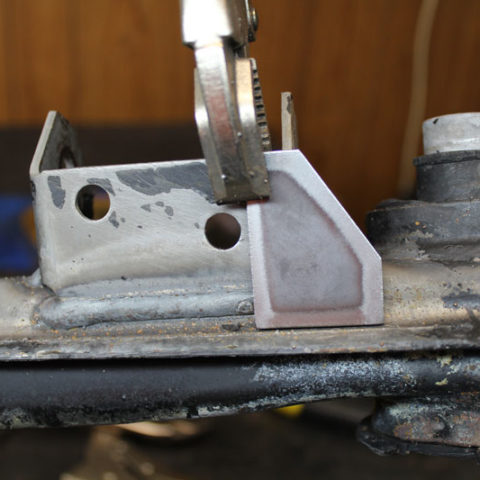
The next small mod to make is to pop them in the vice, and bend them a few degrees inwards.
You can see the bend line marked in black in the picture below.
Check all edges line up with the subframe, if not, keep bending in small amounts until they fit with no large gaps.
Once this is done, tack weld into position as shown below.
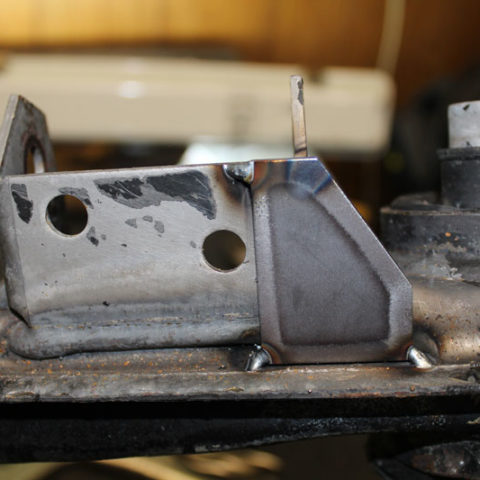
The last two smaller tabs are for the innermost tailing arm mount.
Position these until they line up .
The notch is to clear the weld as shown in the below picture.
Once they are in position, tack into place.
Go back and weld completely around the outside of all the tabs.
Be sure to weld them swapping back and forth between sides, to ensure no one place receives excessive heat.
Let the welds cool naturally for strength.
Done!
Wire brush your welds and get some from of bare metal primer on them asap.
-
This is a fitment guide for fitting our rear camber/toe adjustment brackets.

These brackets are used to convert the factory E30 rear subframe from its fixed alignment settings, to having adjustable camber and toe.
To adjust both camber AND toe, you will need to purchase TWO kits.
This modification can only be done with the subframe removed from the car.
So do that now….
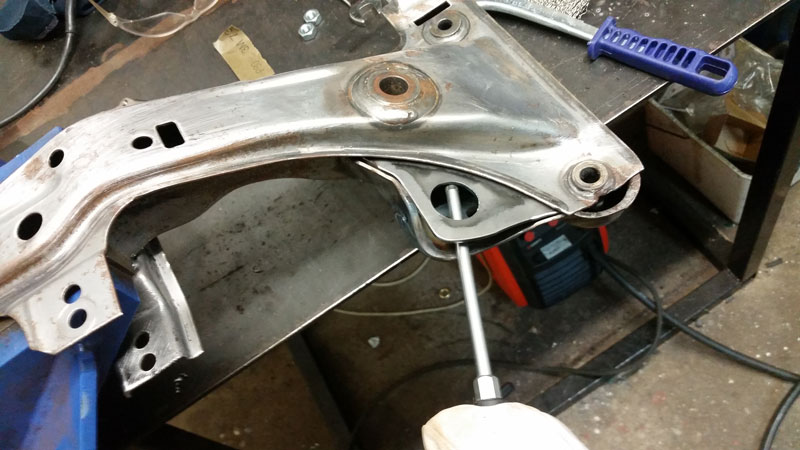
OK, after a thorough degrease and stripping of the paint off the trailing arm mounts, the next step is to get your subframe nice and level.
This step is super important, otherwise this modification will just not do what you want it to.
The best way to achieve this, is once your subframe bushes are out (you were going to do those at the same time, right?) use the bottom of the tubes to support the subframe, and the top to place your level on.
Be sure to level the subframe left to right and front to back.
The trailing arm brackets closest to the wheels (outer) will be for toe adjustment, whilst the brackets closest to the diff will be used for camber adjustment.
The following section is for fitting the camber adjusters.
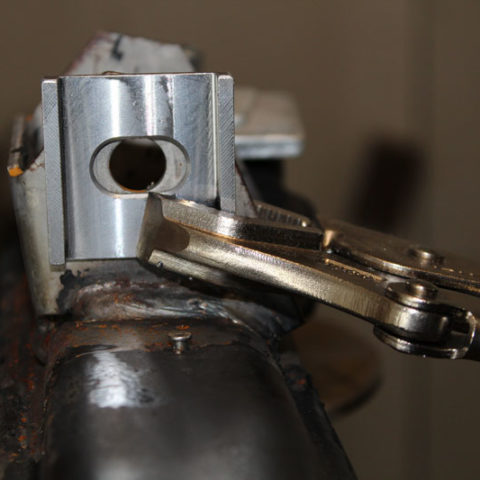
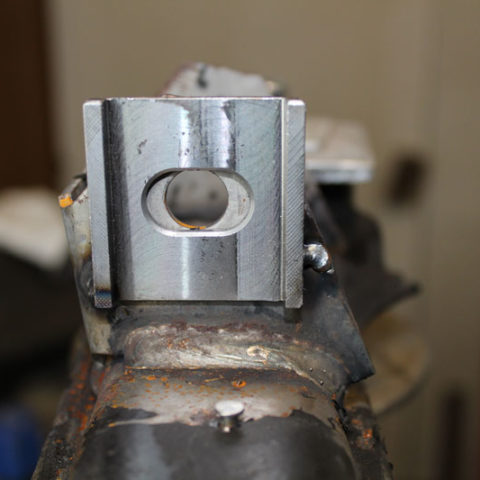
On the inner trailing arm mounts (closest to the diff) the brackets to adjust camber need to be positioned with the slots vertical like in the picture below.
Take your adjuster bracket and line up the bottom of the slot with the factory bolt holes on both sides of the mount.
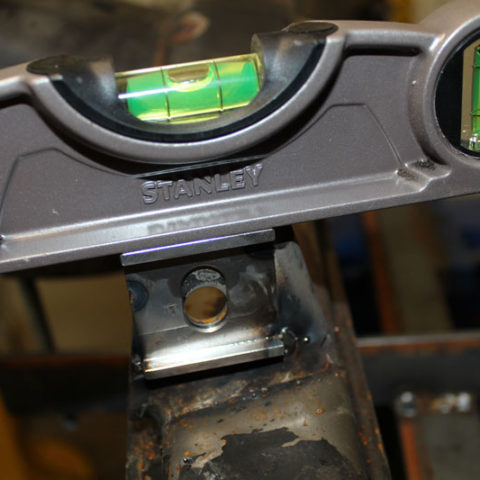
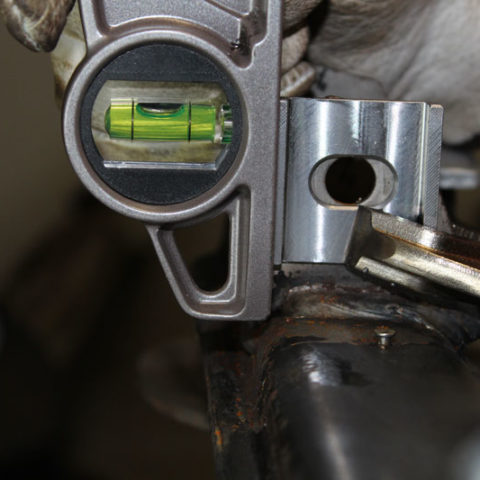
Take some time in ensuring they are level, so the slots run exactly vertically.
Level the bracket on the machined surface as shown in the picture below.
You can use either the eccentric bolts or a clamp to hold them in place whilst you tack them.
Use anti-splatter or something to ensure no slag/weld spatter can stick to the machined adjustment surface.
Weld around the edges completely.
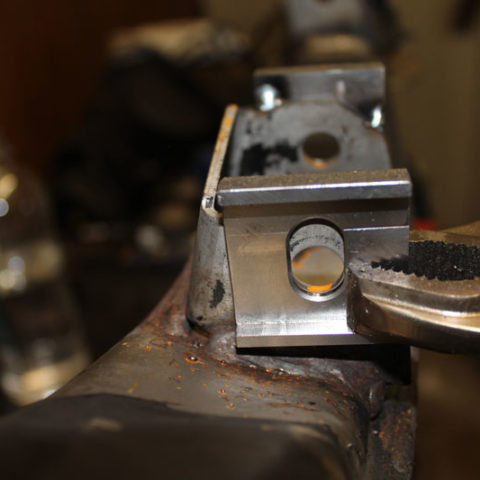
Now it is time to make the slots.
The easiest tool for this is a die grinder, preferably with a carbide end burr.
Die grind out the factory trailing arm mount bolt holes so they match the slots in the adjustment bracket.
Be patient to ensure you do not touch the bracket!
Clean up any burrs left by the die grinder.
The next steps are for fitting the toe adjusters.
The toe adjustment brackets are fitted to the outer mounts (closest to the wheel)
These are mounted differently to the camber adjusters!!, with the slot being orientated horizontally and centered to the factory bolt hole. (see pic below)
Once in position and centered, ensure the adjustment brackets are levelled to the subframe.
Level these by once again levelling off the machined surface, which will be vertical now.
Ensure they are 90 degrees to the subframe.
Hold in place securely and tack weld.
Recheck everything and if correct, completely weld around the perimeter, making sure you once again prevent any splatter from landing on the machined face.
Repeat the same process of carefully die grinding out the trailing arm holes to match the slots in the bracket.
Clean up your burrs and sharp edges before painting.
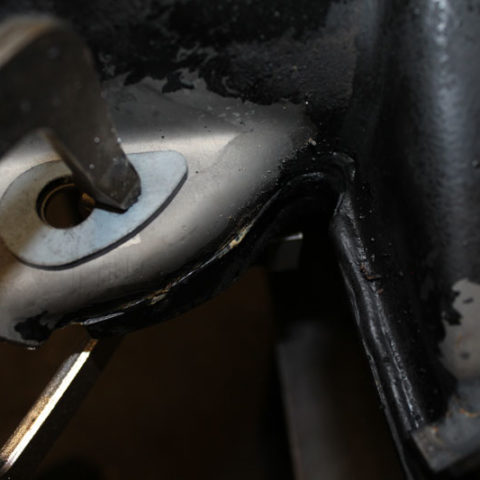
Please note!
If you have, or are installing poly bushes at this time, be aware that the inner section of the top of the bush may need to be trimmed in order to clear the eccentric nut/washer.
This is easily done with a hacksaw. (See below pic)
We recommend reinforcing the trailing arm mounting points and differential mounting points at the same time whilst your subframe is out.
Check out the links below.
Trailing arm mount reinforcement kit
Differential mount reinforcement kit
If you have any questions regarding the fitting of this kit, feel free to shoot us a message or give us a call!